


 A question I’m frequently asked is, where do you start when improving a poorly performing duct system? Do you tear it out and start over again, or is there an easier way? The good news is, there is a simple way and a logical pattern you can follow to optimize a duct system. Let’s look at four steps you can use to start correcting duct systems in a sequential order.
Step One: Pre-Assessment
Most professionals go straight to the duct system when they suspect an airflow problem. Instead, I encourage you to start at the equipment with a pre-assessment. This establishes airflow requirements and provides valuable diagnostic clues that determine how you proceed. Begin gathering basic information at the equipment, such as:
- Equipment type
- Model numbers
- Outdoor unit tonnage
- Fan speed settings, and
- Maximum rated total external static pressure (TESP).
You can determine required fan airflow with this information plus a few calculations. To make this easy, NCI developed a Required Airflow Table to make this fast and simple. To get a copy of it, send me an email.
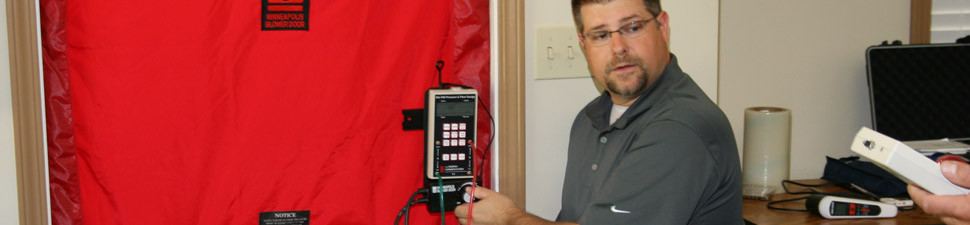
Once you establish required fan airflow and maximum TESP, measure and diagnose static pressure readings. Use them to determine if an airflow problem exists and where it is located. These tests can be completed in 15 minutes or less with
a little practice.
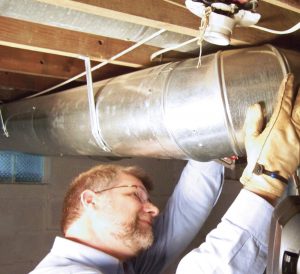
Based on your test results, visually inspect the duct system where the highest static pressure readings were measured to better identify airflow problems. Look for kinked, improperly suspended, and poorly installed ducts. Be sure to take photos of problem areas to show your customer.
Also, don’t forget to verify proper equipment size before you offer duct repairs. One of the worst mistakes you can make is to fix a duct system on oversized equipment. If you do that, you’ll only make the system worse. New equipment should be a discussion point when duct issues exist.
At this stage it’s time to discuss your findings. Typically, you’ll either plant a seed for additional airflow diagnostic testing or your customer will want a price to fix their airflow problems. If everything works out, you sell them a solution to their pain, and you move to the second step.
Note: To keep this article short, I purposely left off the sales and discussion side that needs to take place here — it deserves its own article. There is a science to generating customer interest in duct system issues. Take it from someone who learned the hard way.
Step Two: System Assessment
 The second step to optimize a duct system involves determining room airflow measurements. It’s hard to diagnose a duct system if you don’t know how much air a room should be getting. You pinpoint system defects in this step and use the information to put together a detailed scope of work.
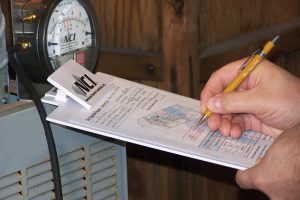
Create a floor plan and duct schematic. On this document capture all the necessary information you’ll need. This typically includes room dimensions, orientation, and duct system details, such as sizes and locations.
From these details you estimate room airflow. Some contractors use airflow values from a load calculation they performed, while others determine this with some simple calculations and input from the customer. This important number gives you an airflow target to aim for as you measure.
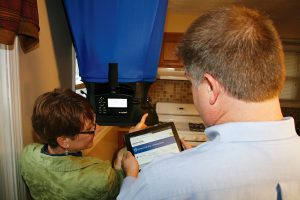
Once room airflow values are estimated, measure delivered airflow from all supply registers and return grilles with a commercial-grade air balancing hood. You might be tempted to skip this step, but it’s the only way to know which ducts work, and which don’t. When you have all room airflow measurements, compare measured room airflow with estimated airflow to diagnose the system. This is where the rubber meets the road.
At this stage in testing, you begin to see which portions of the duct system can be left alone and which ones need repair. If measured airflow is within 10% of estimated room airflow, the duct is working as intended. Any ducts with measured airflow falling outside this range need repair. Create a detailed scope of work for your installation team using this information.
Doing this step with a customer lets them see they made the right decision. Some salespeople use this technique to focus on a hot or cold room before a job is sold to show what they can achieve when their services are purchased. This moves the discussion beyond equipment and focuses it on the system too.
Step Three: Duct System Improvements
 Once you’ve determined a scope of work, the duct system is redesigned and resized. Remember, you keep what’s working well and repair what isn’t.
Review the upgraded design with the installation team. This important part of the project is where many obstacles are identified and prevented. Don’t promise a new upstairs duct through a closet that can’t be installed – the entire project starts off wrong. If you make a recommendation, be sure it can be performed. If you sold something that can’t be done, don’t throw the installers under the bus. Be accountable and make it right.
Step Four: Test Out and Balancing
After work is completed, test-out and make final adjustments to quantify the level of improvement. This is typically the most overlooked step in the process. Many professionals have too much faith in their designs and the programs they use. Design does not equal reality.
It must be proven in the field through testing. When the test-out is complete, print final reports with the improved results for your customer to see. This is an extra insurance policy showing they got what they paid for and proof of your success. Also, be sure to share the results with the installers. Most never know how well their work performs.
Tapping Those Ducts
There is an untapped market in the HVAC industry waiting to be discovered if you’ll only look through a different set of lenses. Testing allows you to see the HVAC system from a perspective that few understand. Use this knowledge to confidently solve problems that others only can guess about. I hope you’re able to see a picture of what is possible from this high-level view.
Leave a Reply
You must be logged in to post a comment.